Overview
We offer multiple template options for a better user experience for you and your customers. You can
customize templates for company-wide use or specific use for stations, tasks, or resources. Here’s how to set up notification templates at the
company level.
Back to the top ↑
Company-wide Notifications
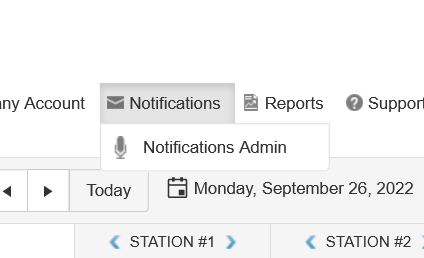
Edit company-wide notifications settings via Notifications > Notifications Admin. These are
your default notification
templates for email, text, and phone reminders at the Company level.
Back to the top ↑
Editing Notification Templates at Company level: Email
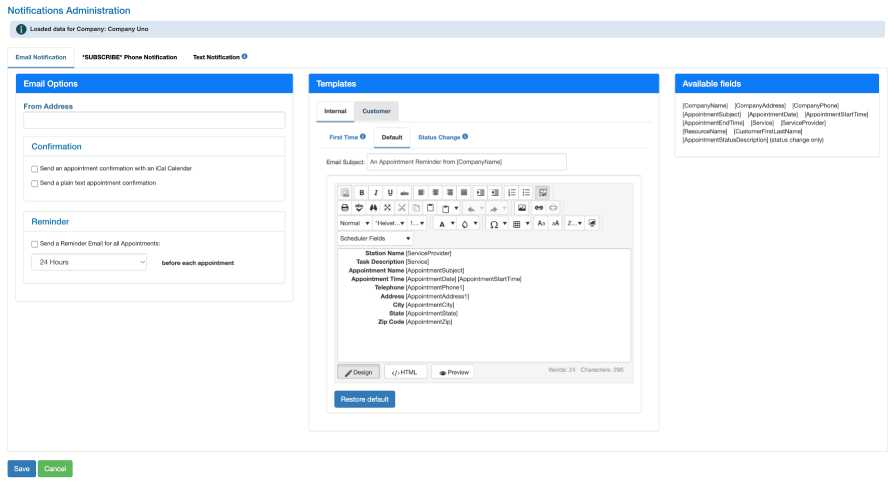
Here’s how to set up email notification templates.
- Email settings and options. Fill in the critical fields and opt in to add confirmations and
reminders, and the ability for your customers to add the appointment to their own digital calendars.
- Select audience. Choose your audience: either to alert an internal stakeholder or a customer.
Then, select the type of template you want to edit.
- First Time. Choose this template to provide specific instructions only suited for a customer’s first
visit. Examples include bringing in ID and insurance card; completed paperwork; appointment cancellation
policy; and any other special instructions helpful to new customers.
- Default. Use this template as your standard template for most reminders.
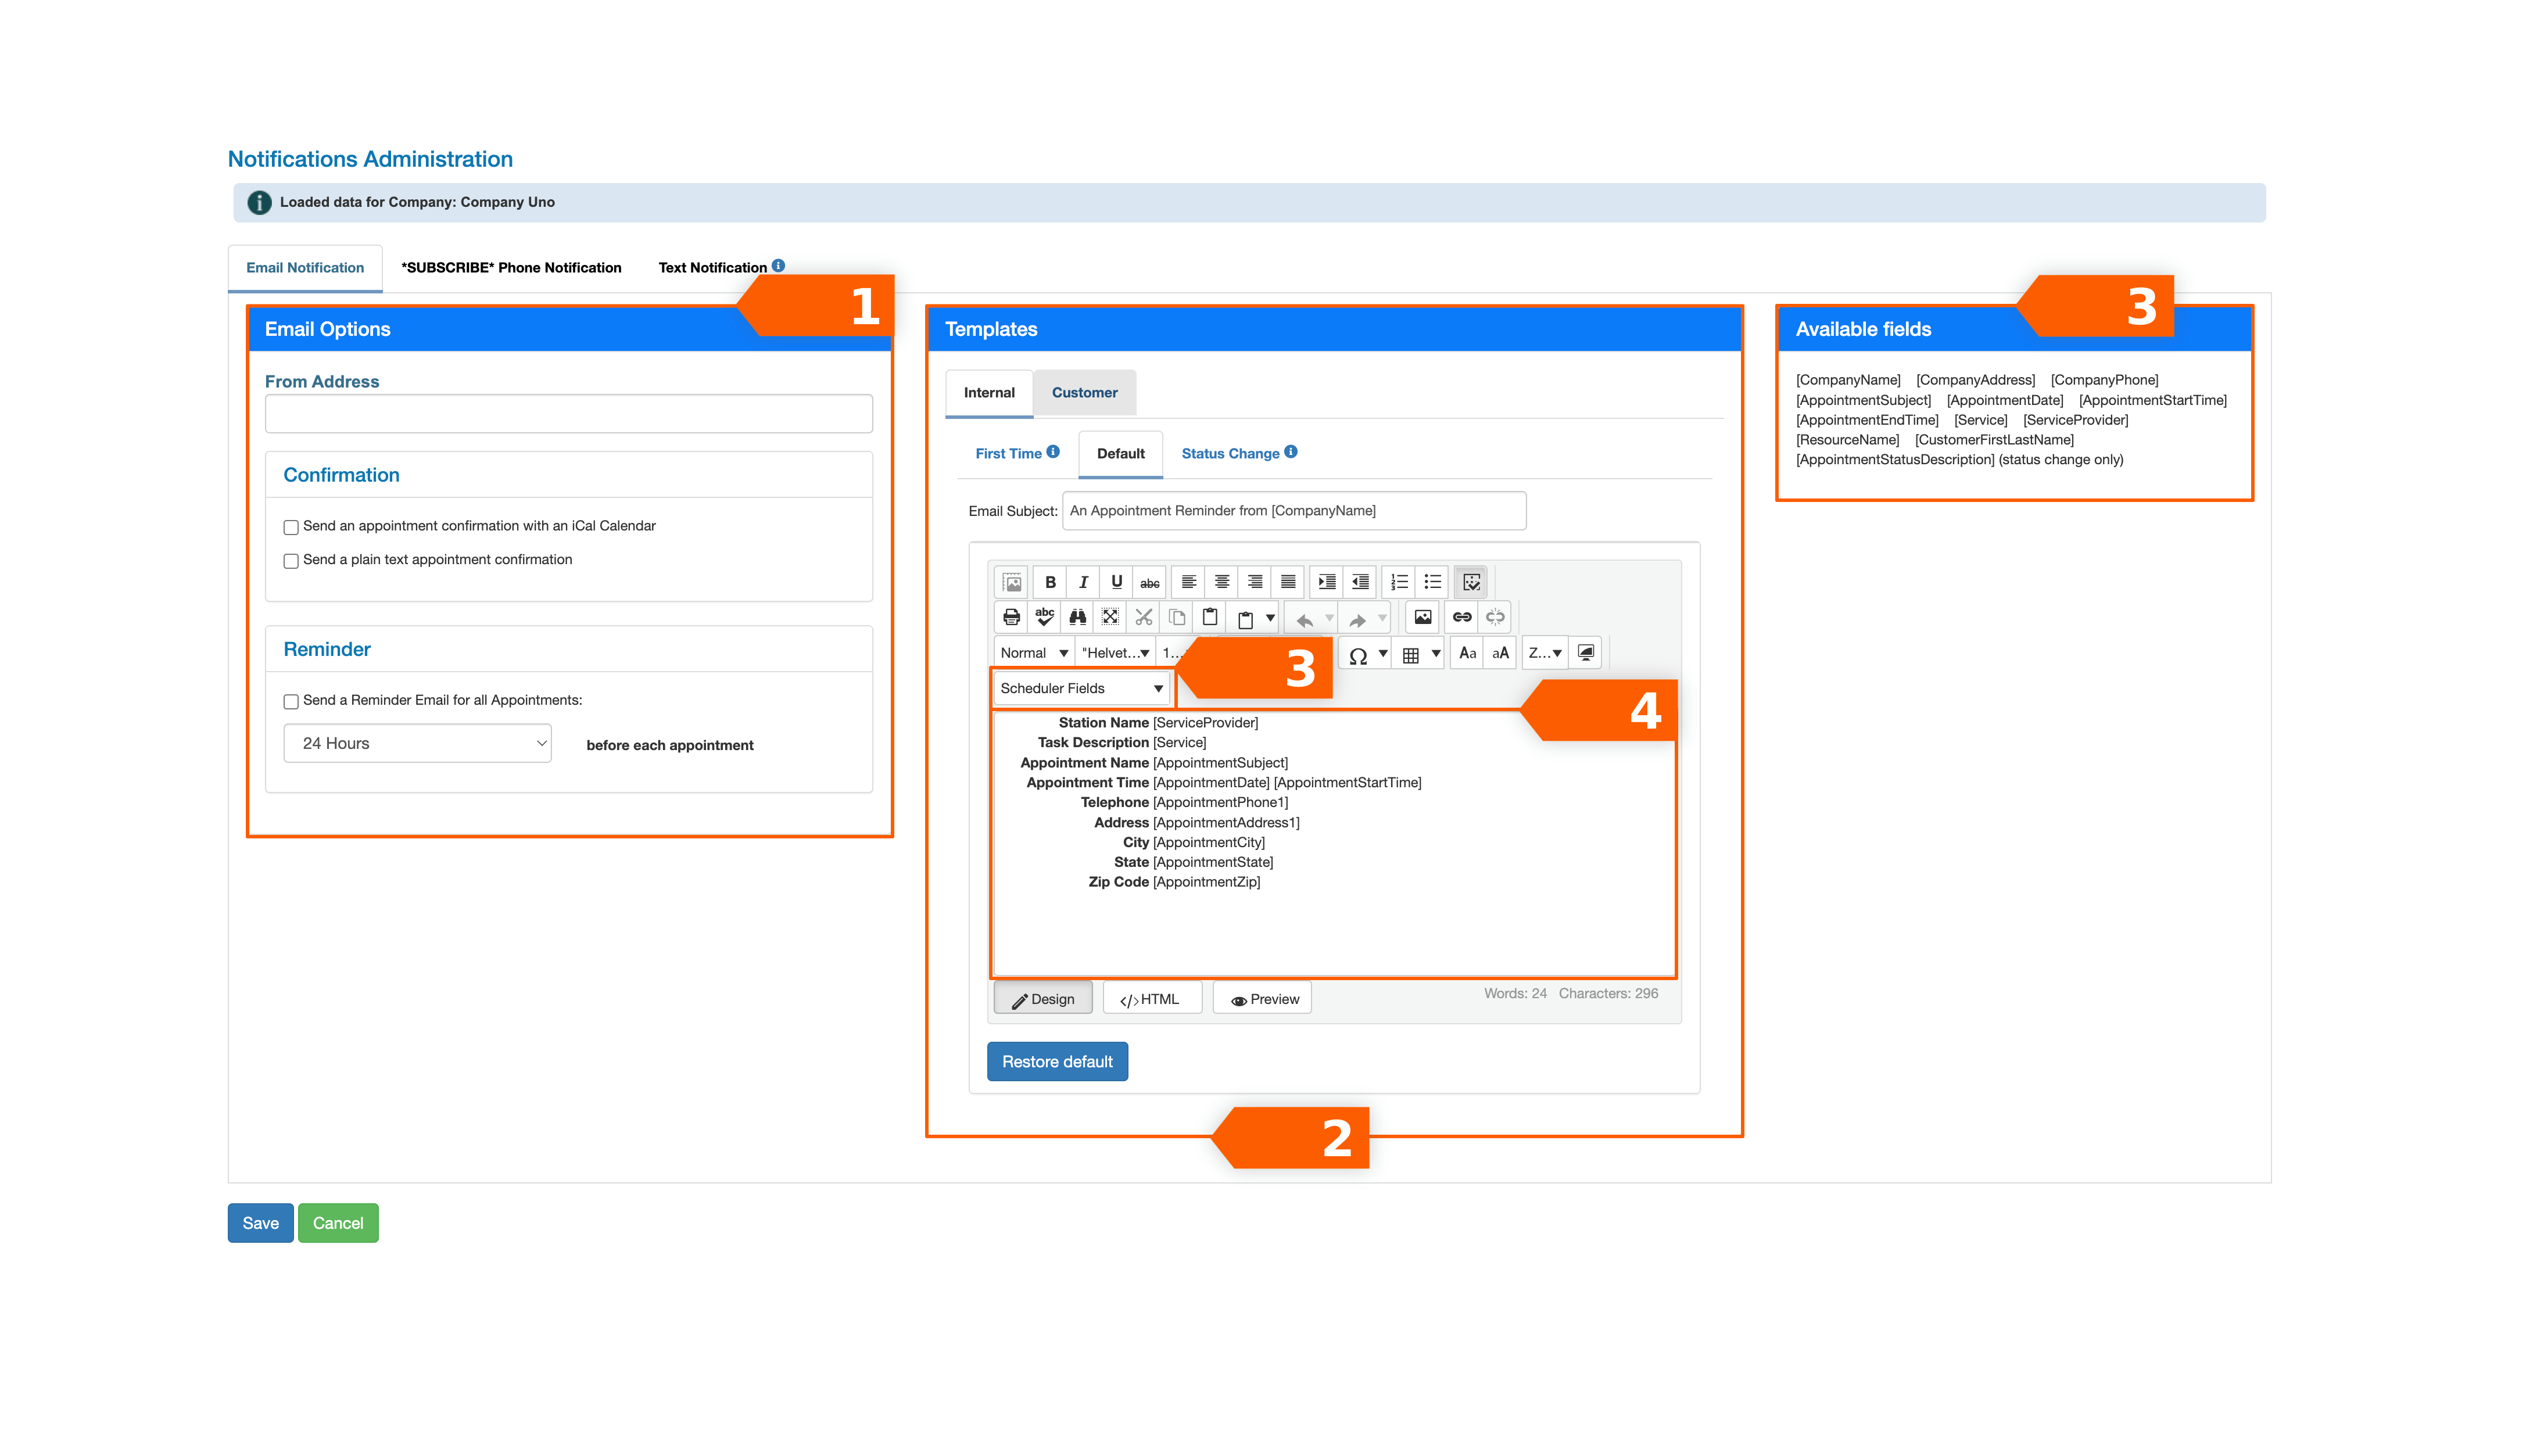
- Status Change. Use this template to notify customers of a change to their appointment. The number of
statuses will vary
depending on your plan and will be listed when you select the Status Change tab.
- Select each status. Decide which statuses you would like to create notifications for by selecting
each checkbox.
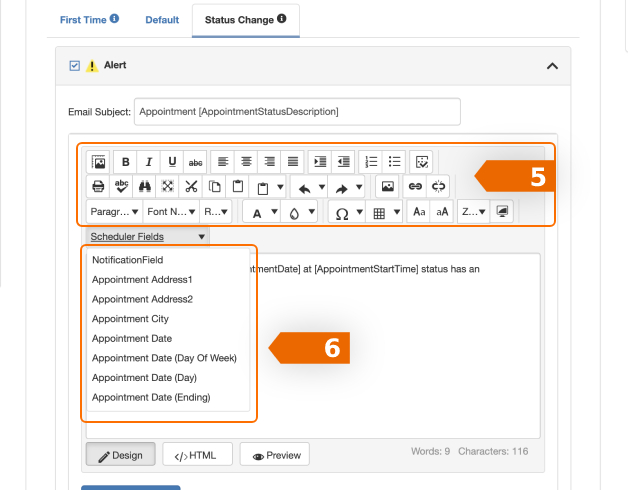
- Edit the template. Once you select the status, choose the drop-down arrow (7a) to expand the
window to reveal the template. Repeat for
each individual status notification you choose. Use the editor to change styles. Choose your own style from
the standard
editor (7b) including fonts, spacing, adding links, etc.
- Insert custom information. Insert useful information into your automatic message like Appointment
Time, Appointment
Date, Address, Phone, etc. from the Scheduler available fields list.
- Save. Be sure to select the Save button to save your work. Click cancel if you would
like to disregard your changes.
Back to the top ↑
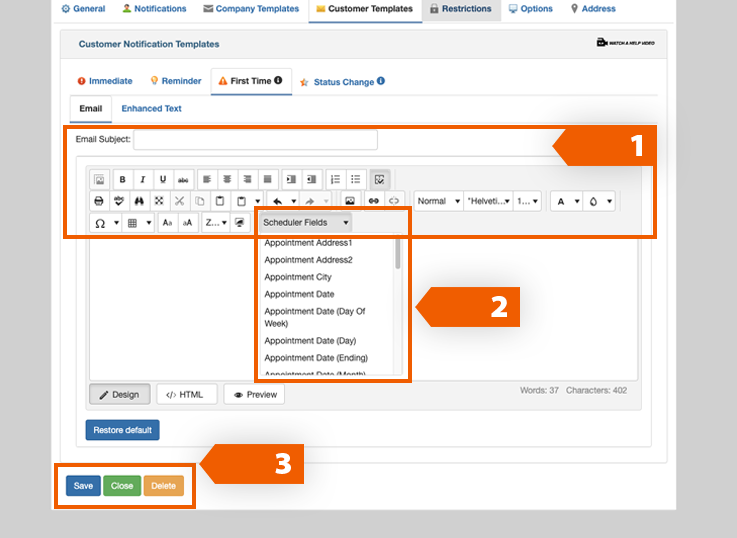
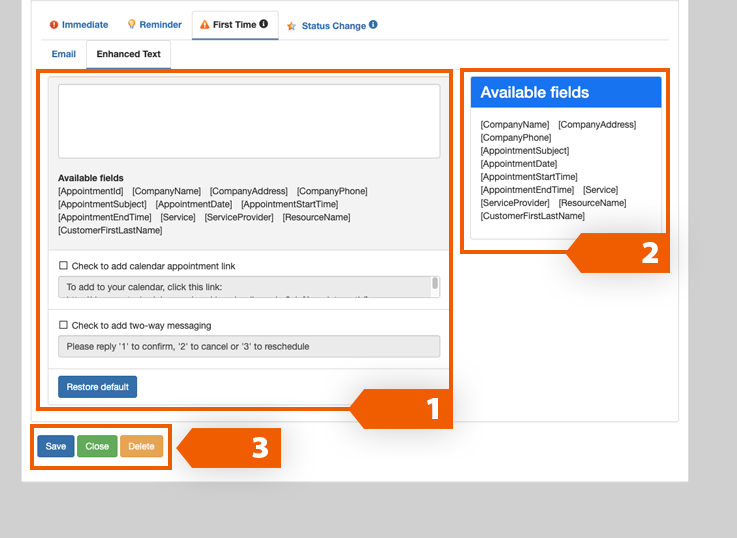
Editing First Time Appointment Email Template.
Choose this template to provide specific instructions only suited for a customer’s first visit. Examples include
reminders to bring in an ID and insurance card or completed paperwork; list your appointment cancellation policy;
and
any other special instructions helpful to new customers. The instructions are the same for editing the Company
first-time appointment template.
- Edit the template. Use the editor to change styles including fonts, spacing, adding links, etc.
- Insert custom information. Insert useful information into your automatic message like Appointment Time,
Appointment Date,
Address, Phone, etc., from the Scheduler available fields list.
- Select Save to save your changes, Close to close the window, and Delete only if you wish to delete the Station and
reassign the appointments to another station.
Back to the top ↑
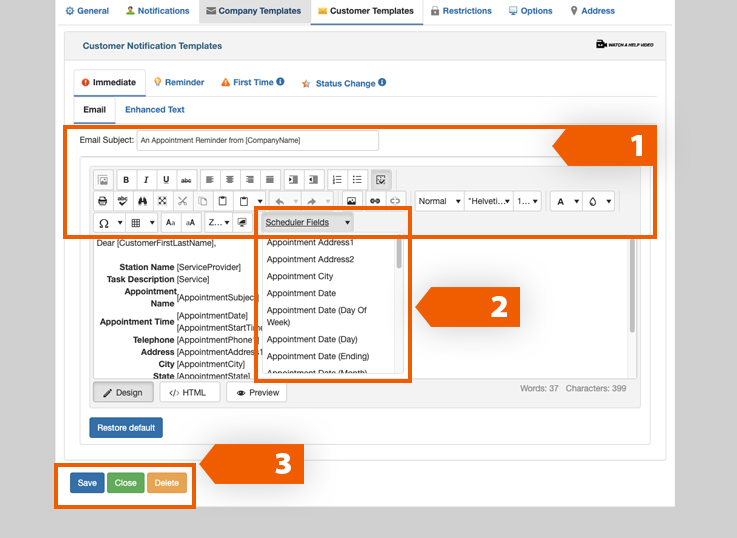
Editing Immediate Email Template.
Use this template for sending out immediate notifications via email after creating an appointment. This is helpful for
customers to reduce no-show appointments, and also to alert internal staff of a new customer appointment. You may
customize the message and insert the available fields from the Scheduler that appear in the column on the right. At any
time, you may restore the default by selecting the Restore Default button.. The instructions are the same for editing the Company
first-time appointment template.
- Edit the template. Use the editor to change styles including fonts, spacing, adding links, etc.
- Insert custom information. Insert useful information into your automatic message like Appointment Time, Appointment Date, Address, Phone, etc.,
from the Scheduler available fields list.
- Save. Be sure to select the Save button to save your work. Click Cancel if you would like
to disregard your changes.

Back to the top ↑
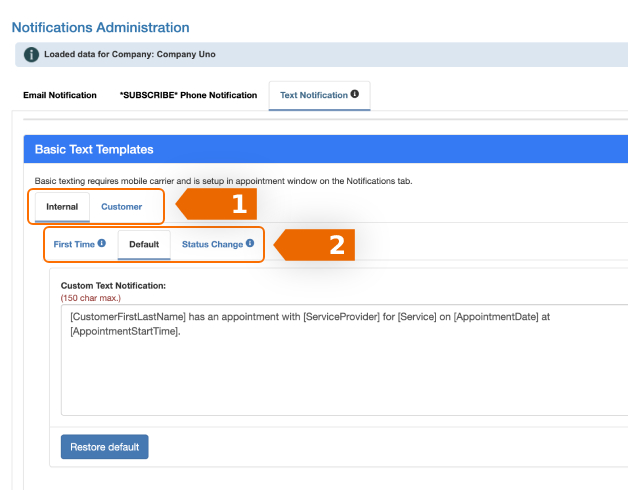
Editing Notification Templates at Company level: Text
Here’s how to set up text notification templates at the company level.
-
Text template. Choose your audience: either to alert an internal stakeholder or a customer.
- Then, select the type of template you want to edit.
-
First Time. Choose this template to provide specific instructions only suited for a customer’s first
visit. Examples include
bringing in ID and insurance card; completed paperwork; appointment cancellation policy; and any other
special
instructions helpful to new customers.
- Default. Use this template as your standard template for most reminders.
- Status Change. Use this template to notify customers of a change to their appointment. The number
of statuses will vary depending on
your plan and will be listed when you select the Status Change tab.
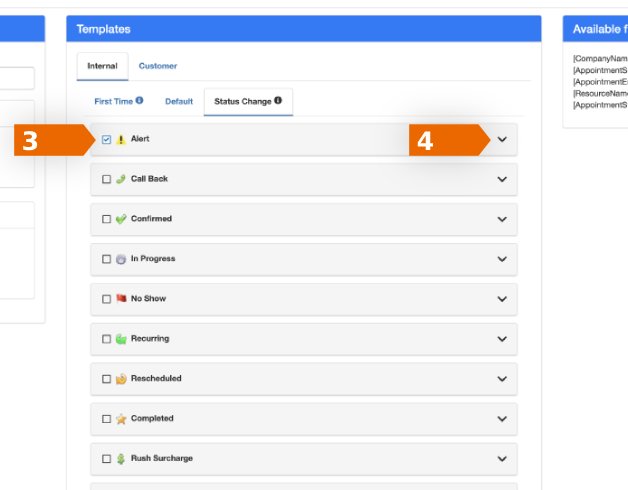
- Select each status. Decide which statuses you would like to create notifications for by selecting
each checkbox.
- Expand to edit template. Once you select the status, choose the drop-down arrow to expand the window
to reveal the
template. Repeat for each individual status notification you choose.
- Edit template. Use the editor to change styles including fonts, spacing, adding links, etc.
- Insert custom information. Insert useful information into your automatic message like Appointment
Time, Appointment Date, Address, Phone, etc. from
the Scheduler available fields list.
- Save. Be sure to select the Save button to save your work. Click cancel if you would
like to disregard your changes.
Back to the top ↑
Editing First Time Appointment SMS Template.
Choose this template to provide specific instructions
only suited for a customer’s first visit. Examples include reminders to bring in an ID and insurance card
or completed paperwork; list your appointment cancellation policy; and any other special instructions
helpful to new customers. The instructions here show the Customer template. The instructions are the
same for editing the Company first-time appointment template.
- Edit the template. You have 150 characters maximum for your SMS message.
- Customize the message. You may customize the message and insert the available fields from the
Scheduler that appear in the column on the right. At any time, you may restore the default by selecting the
Restore Default button.
- Select Save to save your changes, Close to close the window, and Delete only if you wish to
delete the Station and reassign the appointments to another station.
Back to the top ↑
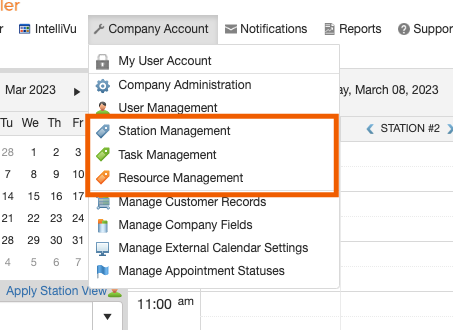
Station, Task, or Resource Notification Overview
Edit these specific notifications settings via Company Account. This is where you create your default notification
templates for email, text, and phone reminders at the station, task, or resource level. If you have four stations for
example, and want to create notifications for each station, you will need to repeat this process for each station. The
process is the same for each task and each resource.
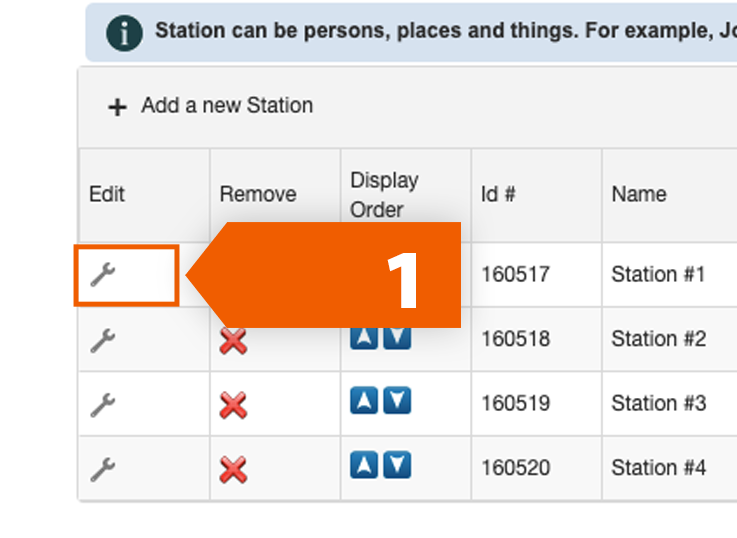
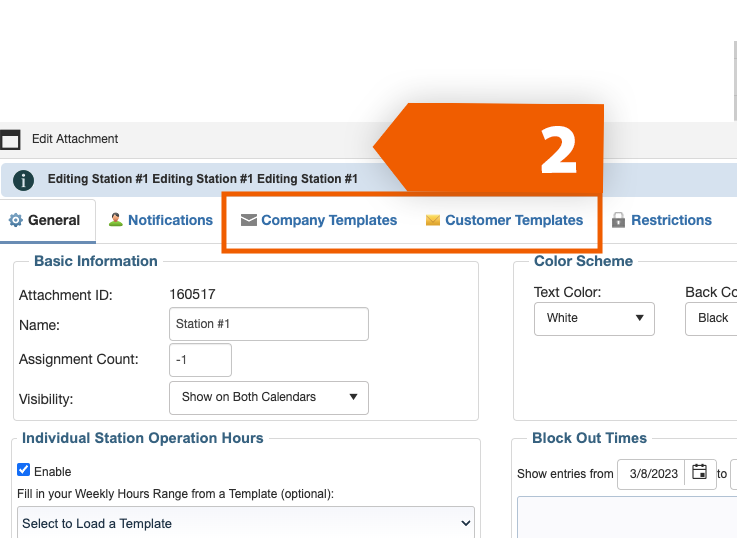
Editing Station templates
-
Select the station you wish to set up the template by clicking on the wrench icon.
-
Choose the intended audience, either internal stakeholders or customers. The windows and processes are the same for both company and customer
templates.
-
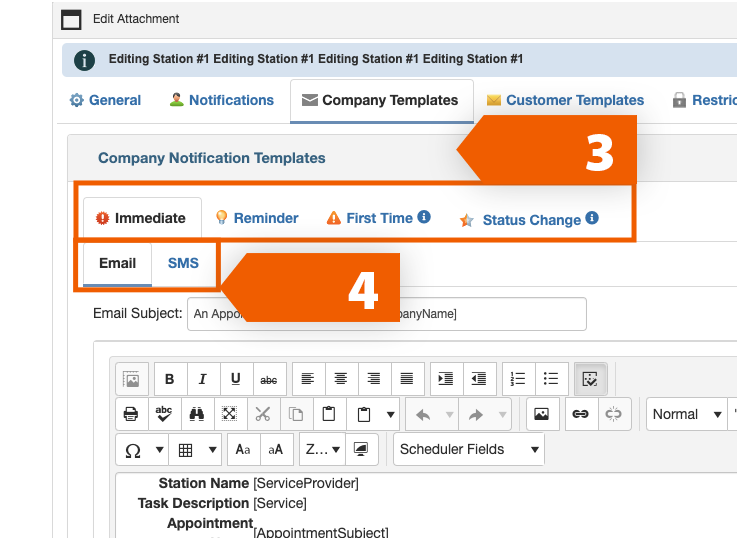
Select the type of template you want to edit. Immediate, First Time, and Default are the same format and instructions are the same for all three templates.
Here are special instructions on how to use Status Change Template.
-
Immediate. This option is for the message that we send out immediately after the appointment is created. This is helpful for
customers to confirm their appointment and also to alert internal staff of a new customer appointment. For more details
on using this template, click here.
-
First Time. Choose this template to provide specific instructions only suited for a customer’s first visit. Examples
include bringing in ID and insurance card; completed paperwork; appointment cancellation policy; and any other special
instructions helpful to new customers. For more details on using this template, click here.
-
Default. Use this template as your standard template for most reminders. For more details on using this template, click here.
-
Status Change. Use this template to notify customers of a change to their appointment. The number of statuses will vary depending on
your plan and will be listed when you select the Status Change tab. For more details on using this template, click here.
- Then select the platform to use to send the notification.
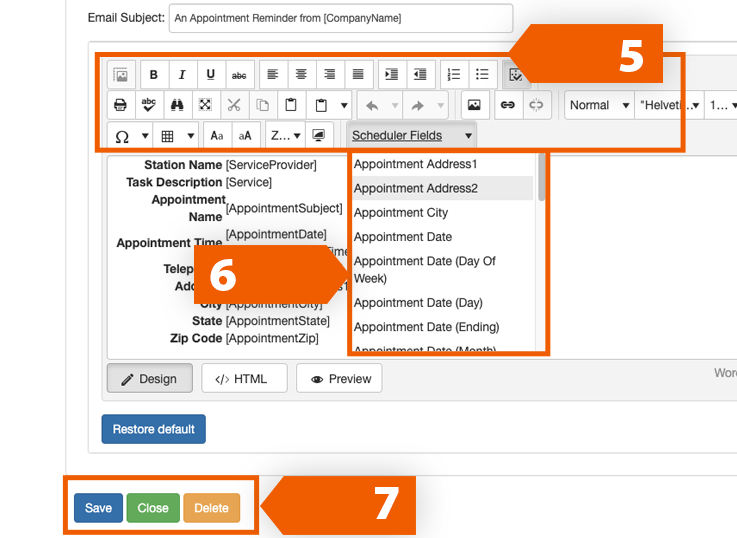
- Edit Email Immediate template. Use the editor to change styles. Choose your own style from the
standard editor including fonts, spacing, adding links, etc.
- Insert custom information. Insert useful information into your automatic message like Appointment Time, Appointment Date, Address, Phone, etc. from
the Scheduler available fields list.
- Select Save to save your changes, Close to close the window, and Delete only if you wish to delete the Station and
reassign the appointments to another station.
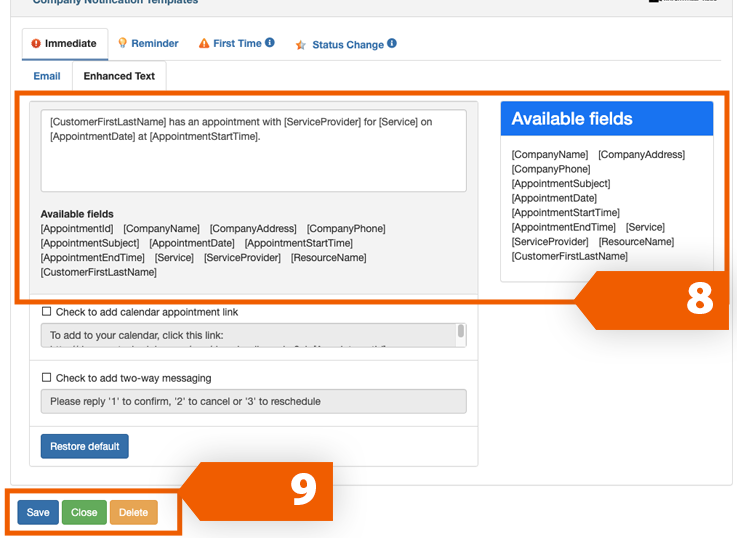
- Edit SMS Immediate template. You have 150 characters maximum for your SMS message. You may customize the message and insert the available fields from the Scheduler that appear
in the column on the right. At any time, you may restore the default by selecting the Restore Default button.
- Select Save to save your changes, Close to close the window, and Delete only if you wish to delete the Station and
reassign the appointments to another station.
Back to the top ↑